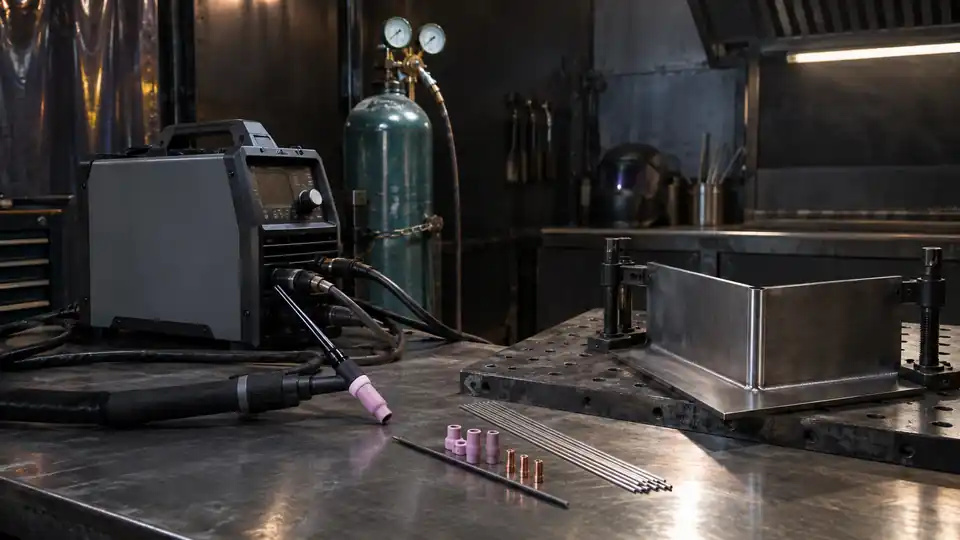
Learning how to choose a TIG welder starts with one question: what metal and what kind of work will the machine handle? A compact DC TIG welder may be a smart fit for stainless tubing and mild-steel repairs, while aluminum work usually calls for an AC/DC machine with controls suited to aluminum’s oxide layer. The process label alone does not tell you enough.
A useful choice balances current type, output range, input power, arc starting, controls, duty cycle, torch equipment, and the materials you plan to weld. A machine with impressive maximum amperage can still frustrate you if its low-amperage control is poor, its torch is sold separately, or it lacks the AC function your project requires.
Start With the Metal You Need to Weld
Material should guide the first major decision. TIG, also called GTAW, uses a nonconsumable tungsten electrode to create the arc. Filler metal can be added separately, giving the operator close control over the size and shape of the weld. That control feels wonderful on clean stainless tubing, where a small change in torch position can alter the bead almost immediately.
For carbon steel, stainless steel, copper, and many other conductive metals, DC TIG is commonly used. Aluminum usually requires AC TIG because alternating current helps disrupt the tenacious oxide layer on the aluminum surface. A DC-only TIG machine may weld steel beautifully, yet it does not become an aluminum TIG machine through a different tungsten or gas setting.
| Typical Work | Machine Capability to Look For | Why It Matters |
|---|---|---|
| Steel or stainless steel | DC TIG, suitable amperage range, stable arc control | DC is commonly used for these materials, and low-current control matters on thin sections. |
| Aluminum | AC TIG, preferably with adjustable AC controls | AC helps manage the aluminum oxide layer and gives access to aluminum-specific arc settings. |
| Mixed steel and aluminum projects | AC/DC TIG | One machine can support both current types, provided the torch, gas, tungsten, and setup are also appropriate. |
| Occasional TIG alongside stick welding | Multiprocess machine with verified TIG functions | The label may describe lift TIG rather than full-featured high-frequency TIG, so the manual deserves a close look. |
A stainless exhaust component and a thick aluminum bracket may sit on the same workbench, but they place different demands on the power source. If aluminum is a definite part of the plan, start with AC/DC capability instead of hoping a future accessory will fill that gap.
AC, DC, and AC/DC TIG Explained
DC TIG for Steel and Stainless
DC TIG is often the practical choice for steel and stainless fabrication. The arc can be smooth and precise, which helps with thin sheet, tubing, and visible joints where excess heat leaves a blue or brown halo around the bead. A machine with a controllable low end can make delicate work less jumpy, especially near the edge of a thin part.
For example, a reader repairing a stainless instrument bracket may need more finesse than raw output. A machine capable of very high amperage offers little benefit if it struggles to establish a stable arc at the lower settings the bracket needs. Output range matters at both ends.
AC TIG for Aluminum
AC TIG changes direction repeatedly during welding. That alternating current supports the cleaning action needed to disrupt aluminum oxide while still providing welding current to the base metal. Aluminum also conducts heat rapidly, so the required amperage and technique can shift as the workpiece warms.
Look for AC controls such as balance and frequency when the machine provides them. The exact control names and adjustment ranges vary by model, so the manufacturer’s manual should explain how each function works. These features can help tune cleaning action, arc focus, and puddle behavior, but they do not replace clean material, suitable filler, correct tungsten preparation, and proper shielding.
A small aluminum panel may begin with a crisp puddle and then suddenly spread heat across a larger area. That change is one reason aluminum work rewards an AC/DC machine with a responsive foot pedal or hand control. The operator can add current as needed and back it off before the panel overheats.
Choose the Amperage Range for the Workpiece
Amperage affects how much heat the arc can place into the joint. A machine needs enough maximum output for the materials and joint designs you expect to weld, yet maximum amperage is only half the story. The minimum output and the machine’s arc behavior at low settings matter greatly for thin sheet and small tubing.
Start by listing the thickest material you realistically plan to weld, then review the manufacturer’s output guidance for that material and joint type. A butt joint, fillet joint, heat sink, bevel, alloy, and welding position can all change the current required. No single amperage number describes every job.
- Thin sheet and tubing: prioritize stable low-amperage operation and fine control.
- Medium-thickness fabrication: look for enough headroom to maintain a useful puddle without operating at the machine’s limit.
- Thicker aluminum: AC capability and adequate output become especially important because aluminum pulls heat away from the weld area.
- Small repair jobs: a lower-output machine may be easier to transport and less demanding on the electrical supply.
Suppose a machine advertises a high peak output, but that figure is available only briefly or under specific input conditions. It may still be a good machine, but the headline number should not be treated as continuous operating capacity. Check the output table, input requirements, and duty-cycle information together.
Read Duty Cycle With Its Amperage and Test Basis
Duty cycle describes how long a welder can operate within a stated test period at a stated output before it needs cooling time. A duty cycle listed at one amperage does not apply automatically at every other amperage. The test basis may also differ between machines, so percentages from separate models are not always direct equivalents.
This matters most during repeated welds. Someone making a single short stainless repair may rarely reach the machine’s thermal limit. A fabricator joining a series of aluminum parts may spend much longer at higher current, where cooling pauses can interrupt the rhythm of the work and leave the torch hanging over a cooling joint.
Look for duty-cycle data at the output you expect to use. If a manufacturer provides several test points, read the full chart rather than selecting the largest percentage. A lower percentage at a higher amperage may tell you more about a machine’s practical fit than a larger percentage measured at a light output.
Match the Input Power to Your Electrical Setup
TIG welders commonly use household-voltage or higher-voltage input options, but the actual output depends on the machine design, input current, circuit capacity, and manufacturer requirements. A dual-voltage label means the machine accepts two input ranges. It does not promise identical welding output on both.
A garage user working on brackets may value a machine that can run from an available lower-voltage circuit. A shop with an appropriate higher-voltage circuit may gain access to more of the welder’s rated output, depending on the model and installation. Check the manual before planning a new receptacle, breaker, or circuit change, and follow applicable electrical codes.
Do not assume that a higher-voltage connection automatically produces a better weld. It may provide the input capacity needed for higher output, while the finished weld still depends on joint preparation, settings, shielding, tungsten condition, and technique.
Decide How You Want the Arc to Start
High-Frequency Start
High-frequency start allows the arc to begin without touching the tungsten to the workpiece. That can help protect the tungsten from contamination and reduce the chance of leaving an unwanted mark on a clean stainless part. It is especially useful for visible welds and situations where a controlled start matters.
Lift TIG
Lift TIG uses contact with the workpiece as part of the starting sequence, followed by lifting the torch to establish the arc. It is different from high-frequency TIG. A machine marketed as TIG-capable may provide lift TIG while omitting high-frequency start, a foot pedal, or other advanced controls.
Lift TIG can suit basic repair work when the operator understands the starting method and the machine’s instructions. A person welding a painted shop fixture after removing contamination may accept that arrangement. Someone joining polished stainless components may prefer high-frequency start because tungsten contact and arc-start marks can create extra cleanup.
Check the exact start method in the manual. Also verify whether the torch is included, whether a remote control is supported, and which cables or consumables come in the box. “TIG capable” describes a function, not a complete TIG package.
Look for the Controls That Fit Your Technique
Basic DC TIG may offer current adjustment and a choice of start method. More advanced machines can include pulse, pre-flow, post-flow, slope controls, AC balance, AC frequency, and remote amperage control. Each feature earns its place when it solves a real problem.
- Foot pedal or hand control: lets the operator adjust amperage during the weld, which can help as a part heats up or a joint changes.
- Pulse: alternates between current levels at a selected rate. It can help manage heat input or create a controlled visual rhythm, depending on the application and settings.
- Pre-flow and post-flow: control shielding gas before arc initiation and after the arc stops. Post-flow helps protect the hot tungsten and weld area while they cool.
- AC balance: changes the relationship between cleaning and electrode-negative portions of the AC cycle. The usable range and terminology vary by machine.
- AC frequency: changes the character and focus of the AC arc on machines that provide this adjustment.
More controls can widen the setup options, yet they also add a learning curve. A first TIG machine for steel may need little beyond stable DC output, a suitable torch, and a reliable gas connection. A machine intended for aluminum fabrication deserves closer attention to AC controls and remote current adjustment.
Check What the TIG Package Actually Includes
Two machines can carry similar output ratings while arriving with very different equipment. One may include a TIG torch, ground clamp, regulator, hoses, and foot pedal. Another may require separate purchases for several of those items. Compatible does not mean included.
Review the product page and manual for each item below:
- TIG torch and torch consumable sizes
- Work lead and ground clamp
- Shielding-gas regulator and hose
- Foot pedal or hand remote
- Stick electrode holder, if the machine also supports stick welding
- Gas solenoid operation and connector type
- Replacement collets, cups, back caps, and tungsten compatibility
A torch connection can also affect future flexibility. Some machines support a foot pedal through a dedicated connector, while others use a hand control or provide no remote amperage input. Read the manual rather than assuming that a familiar connector guarantees full control compatibility.
Plan the Shielding Gas and Consumables
TIG normally relies on an external shielding gas, commonly pure argon for many general applications. The exact gas choice and flow setup depend on the material, torch, cup, joint, and manufacturer guidance. Shielding gas protects the molten weld pool and hot tungsten from atmospheric contamination, so a leak, empty cylinder, poor hose connection, or disturbed gas stream can quickly spoil a clean-looking setup.
Tungsten selection also matters. The correct type, diameter, preparation, and current range depend on the process and material. Aluminum AC work may use a different tungsten approach than DC stainless work. A tungsten electrode creates the arc and should not be treated as routine filler metal.
Filler rod is common in TIG, but it is not required for every weld. Some joints can be fused without added filler when the fit-up, thickness, alloy, and application permit it. A machine cannot compensate for contaminated surfaces or an unsuitable filler alloy, so plan the consumables alongside the welder rather than treating them as afterthoughts.
Choose Portability and Size Based on the Job
A compact inverter TIG machine can be easier to carry to a repair site, position beside a workbench, or store between projects. Larger machines may offer more controls, output, or accessories, yet their extra weight and footprint can matter in a crowded garage.
For farm repairs or occasional maintenance, portability may outweigh advanced AC features if the work is limited to steel. A dedicated fabrication table for aluminum parts points toward a different purchase, where AC control, remote amperage adjustment, and duty-cycle information deserve more attention than a small case.
Think about the whole setup, including the gas cylinder, leads, torch, regulator, and work area. A welder that fits on a shelf may still require enough room for safe cylinder placement, cable routing, ventilation, and clear access around the joint.
A Practical Selection Path
- List the metals: decide whether the work includes steel, stainless, aluminum, or several materials.
- Select current type: choose DC for common steel and stainless work, AC/DC if aluminum is part of the plan.
- Estimate the working range: use the manufacturer’s guidance for the thicknesses and joint types you expect to weld.
- Check the low end: thin sheet and small tubing require controlled low-amperage operation.
- Review input requirements: compare the welder’s voltage and circuit needs with the electrical supply you can safely use.
- Read duty-cycle data: match the published amperage and test basis to your likely welding rhythm.
- Choose arc-start and remote controls: decide whether high-frequency start, pulse, and a foot pedal solve problems your work will actually present.
- Verify included equipment: confirm the torch, regulator, leads, pedal, gas connections, and consumables before comparing final cost.
- Read the manual: check supported materials, torch connections, input requirements, gas guidance, and accessory compatibility for the exact model.
Common Buying Mistakes to Avoid
Buying by maximum amperage alone is a common trap. A machine’s top output says little about its low-current stability, AC functions, duty cycle at useful output, or included accessories. A smaller machine with better control may produce a more suitable result on thin stainless than a larger machine with a rough low end.
Another mistake is treating every TIG label as equivalent. Lift TIG is not high-frequency TIG, DC TIG is not AC TIG, and a supported foot pedal is not the same as a pedal included in the package. These distinctions become obvious only after the box arrives and the first setup begins.
Finally, avoid choosing a machine for a material you may never weld. If aluminum is a distant possibility, AC/DC capability may add cost and complexity without helping your regular work. If aluminum is central to the project list, buying DC-only equipment creates a limitation from day one.
Frequently Asked Questions
Do I need AC TIG to weld aluminum?
For common aluminum TIG work, AC capability is generally required because alternating current helps address the surface oxide layer. DC TIG should not be treated as an equivalent substitute. Aluminum also requires suitable filler, tungsten, shielding gas, preparation, and settings.
Is a TIG welder suitable for beginners?
TIG can provide excellent control, but it demands coordination between torch movement, filler addition, shielding gas, and amperage. A machine with clear controls, stable arc starting, and a compatible foot pedal can simplify setup. Skill still develops through proper practice and safe technique.
Is high-frequency start better than lift TIG?
They serve different needs. High-frequency start avoids touching the tungsten to the workpiece and can reduce contamination during arc initiation. Lift TIG can be appropriate for basic work when the operator follows the machine’s starting procedure. The better choice depends on the material, finish requirements, and type of work.
Does every TIG welder include a torch?
No. Some packages include a complete torch and gas equipment, while others require those items separately. Verify the exact contents, connector type, torch rating, and remote-control compatibility before buying.
What is the best TIG welder for thin metal?
Look for stable low-amperage control, a suitable current range, reliable arc starting, and a torch that provides good access to the joint. A foot pedal or hand control can help manage heat as the workpiece warms. The ideal machine also depends on whether the thin metal is steel, stainless, or aluminum.
The Practical Choice
The best way to choose a TIG welder is to match its actual functions to the metal, thickness, electrical supply, and working rhythm you expect. Pick AC/DC for regular aluminum work, DC for many steel and stainless projects, and verify whether the machine offers high-frequency start, remote amperage control, suitable duty-cycle data, and the equipment you need in the package.
Read the specifications as a description of real welding behavior, not a contest of large numbers. A well-matched output range, stable arc, suitable controls, and compatible accessories will matter far more at the joint than an impressive rating that your projects never use.
